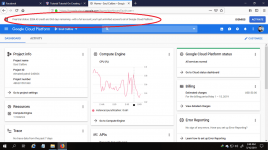
$6 a month lang sa akin nka micro din baka madami kang intances na ginawa kaya ganon-20$ na agad sakin wala pang one month, laki ng kaltas ni gcloud kahit f1-micro lang
You are using an out of date browser. It may not display this or other websites correctly.
You should upgrade or use an alternative browser.
You should upgrade or use an alternative browser.
Closed Tutorial On Creating A Droplet or VM Instance On Google Cloud Platform
- Thread starter Cee Jay
- Start date
-
- Tags
- droplet soul calibre
- Status
- Not open for further replies.
grabi namam..ok lang yan tial lang naman din yan e-20$ na agad sakin wala pang one month, laki ng kaltas ni gcloud kahit f1-micro lang
- TS TS
- #104
Nice! You're welcome!Ayun salamat po sa tutorial. Nakagawa na rin sa wakas. Natagalan lang ako sa vim command na yan hahaha. Hindi pa ako kasi marunong sa linux.
- TS TS
- #105
Naalala ko lang... Asan na ang link ng naunang thread about ganito para makapagbigay ako ng credits.salamat ts. keep on sharing. pero magbigay ng tamang credits sa original na may ari ng thread ts sa susunod.
ToyBitz1017
Eternal Poster
salamat
Requirements:
1. Google Cloud account.
- Create yours by clicking You do not have permission to view the full content of this post. Log in or register now. . You will be credited an amount of $300 that will be valid for 12 months upon successful registration. $300 is enough so there's no need to avail or continue. Iwas din sa bayarin. Hahaha
2. Cloud Console App.
- Download the app in the Play Store or Apple Store
Android App Link: You do not have permission to view the full content of this post. Log in or register now.
3. Brain and Patience
Procedures:
1. Login into https:console.cloud.google.com/ .
2. Go to VM Instances and click "Create VM"
3. It's up to you kung ano ang settings ng gagawin mo. It's your decision kung ano ang country, RAM, vCPU, OS and Storage ang gagamitin mo. Normally, pwede na yung 1vCPU + 1GB RAM + 10GB Persistent SSD. Sa Operating System or OS, bahala ka na kung alin sa mga options doon.
4. Scroll down and click the checkbox for HTTP and HTTPS
5. Click "Save" or "Create" to create the VM Instance
Now, para ma-access using SSH Clients (eg.: JuiceSSH, PuTTY, etc.), create root password and enable SSH Connection.
1. Open Cloud Console App and go to "Resources", then "VM Instances", then select your VM or droplet to configure.
2. Click on the 3-dotted gear on the upper-right corner, then select "Connect Via SSH".
3. Once connected run the following commands:
Code:sudo su rootCode:cd4. Create your own password, click enter then re-type passwordCode:passwd root
5. Run command:
6. Edit and change: "no" into "yes".Code:vim /etc/ssh/sshd_config
7. Save the changes by running:
- PermitRootLogin yes
- PasswordAuthentication yes
Then press "enter" key to save the fileCode::xa
Alternative ways of saving are:
or by pressing "Ctrl" and "o"Code::wq!
* o means override
8. Run:
Code:service sshd restart
Wait a few seconds and you can now access SSH using root account.
Pag nasa edit na ako to change no to Yes, after nyan wala na po ako ibang ma type, even Yung :xa at :wq
Panu po ito? Salamat
gintoki-kun
Honorary Poster
ito ataNaalala ko lang... Asan na ang link ng naunang thread about ganito para makapagbigay ako ng credits.
https://phcorner.net/threads/551347/
Soul Calibre boss?
XAMJYSS143
Forum Contributor
sir matapos ko po ma change ng "yes" ung passwordAuthentication .. di na po ako maka input ng code na :xa sir pano po ito sir pag nag input ako ng :xa tas inter nag next line lang po sya
sinceyesterday_
Addict
boss sa step ba kailangan singapore ang country o ph ?
:wq!sir matapos ko po ma change ng "yes" ung passwordAuthentication .. di na po ako maka input ng code na :xa sir pano po ito sir pag nag input ako ng :xa tas inter nag next line lang po sya
XAMJYSS143
Forum Contributor
sir connected po sir pero no internet connection how to fix po ito
kelan mo ginawa?sir connected po sir pero no internet connection how to fix po ito
-Mithrandir
Eternal Poster
Attachments
-
You do not have permission to view the full content of this post. Log in or register now.
Salamat dito
Legit credit card ang ginamit mo sir?Lupit mo talaga lods. Hahaha baka naman po
Ok.. life saving nga!! thanks Soul Calibre
- Status
- Not open for further replies.
Similar threads
-
Course Udemy | Configure NGINX on a Cloud Server: Digital Ocean & AWS | Limited Time Only | April 07, 2024
- Started by Luwiiiii
- Replies: 0
-
Tutorial Find out if the Government is spying on your phone messages and calls + Fake Tower Cell
- Started by I2rys Reborn
- Replies: 17
-
-
-
Tutorial Setting up Shizuku on Android 10 using a Charger Wire and Laptop/Computer
- Started by angarastevenq
- Replies: 9
Popular Tags
bash
best
centos
computer
debian
debian 9
distro
droplet
dual boot
hack
how
how to
kali
kali linux
kali linux 2
linode
linux
linux distro
linux for beginners
linux os
networking
on
openvpn
operating system
os
ovpn
problem
proxy
python
raspberry pi
samba
script
server
softether
squid
squid proxy
ssh
ssl
terminal
termux
tutorial
ubuntu
update
vpn
vps
vps autoscript
wifi
windows
windows 10
wireless adapter
About this Thread
-
136Replies
-
5KViews
-
38Participants
Last reply from:
marskieboyzz
marskieboyzz
Online statistics
- Members online
- 1,207
- Guests online
- 3,352
- Total visitors
- 4,559

