Hello mga ka PHC share ko lang tong bagong DNS ni Cloudflare na nag papalakas ng ng Internet
DNS: 1.1.1.1 / 1.0.0.1
Tutorial kung pano e change si dns
For Windows Computers:
For Router / Modem
1) Launch your web browser of choice and in the URL bar, type in 192.168.1.1 and press the return/enter key on your keyboard.
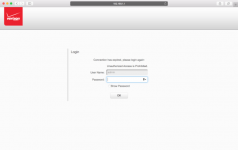
2) What you will see is a login screen where you can enter your username and password for your router – so now you will log in.
3) If your credentials were correct, you’ll be brought to the main configuration page for your router. Click on your router’s network settings button to configure your network in-depth. Mine is called My Network.
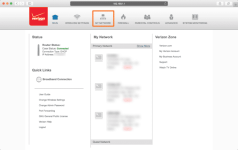
4) Once you load up your network, click on your editing button for the main source of your internet connection. Mine is going to be my Ethernet/Coaxial connection.
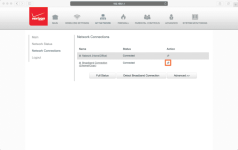
5) You may get a warning message that editing these settings could mess with your internet connection – go ahead and continue anyway if you’re prompted.
6) The next interface shows all the properties of your internet connection. Look for a settings or edit button – in my case it was settings.
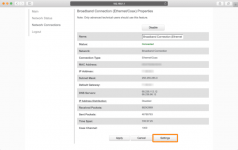
7) Once in editing mode, look for a field related to the DNS settings. In some cases, you may need to change the setting to manual so it can be modified rather than automatically set.
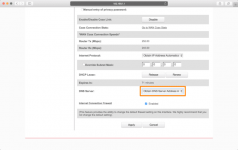
8) Choose a DNS server you wish to use, such as Google’s Public DNS server (1.1.1.1, or 1.0.0.1), and plug it into the primary and secondary DNS settings. Afterwards, click on the apply or save button at the bottom of the page.
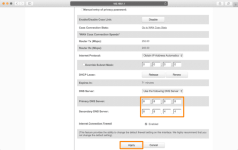
9) After saving your changes, you will be forwarded to the same page you were at before, where you can verify your DNS change.
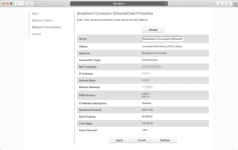
10) Your router may show an IP address of 0.0.0.0 for a few moments as it renews your DHCP lease and re-configures your network. Just give it about 30 seconds and your internet should be fully functional once again.
That’s all there is to it! You’ve changed your network’s DNS settings, and because you’ve done it from the router instead of the device itself, this change affects every machine on your network immediately.
proof of Speed
NO Cloudflare DNS
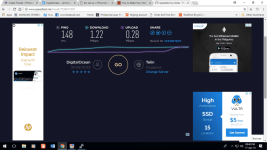
With Cloud Flare DNS
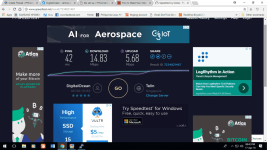
My Modem is E5220 pocket Wifi 3G speed
Walang mawawala kung i try mo hihi
Overall Result: You Now Have more Faster Internet and More Secured Internet
DNS: 1.1.1.1 / 1.0.0.1
Tutorial kung pano e change si dns
For Windows Computers:
- Tap Start and then click on Control Panel.
- Click on Network and Internet, and then tap Change Adapter Settings.
- Right-click on the Wi-Fi network you are connected to, then click Properties.
- Select Internet Protocol Version 4 and click Properties, and then write down any existing DNS server entries for future reference.
- Now tap Use The Following DNS Server Addresses, and replace those addresses with the 1.1.1.1 DNS addresses: For IPv4: 1.1.1.1 and 1.0.0.1; and For IPv6: 2606:4700:4700::1111 and 2606:4700:4700::1001
- Click OK, then Close, and Restart your browser.
- Connect to your preferred WiFi network.
- Enter your router’s gateway IP address in your browser. Fill in your username and password, if asked.
- In your router’s configuration page, locate the DNS server settings, and enter any existing DNS server entries for future reference.
- Replace those addresses with the 1.1.1.1 DNS addresses: For IPv4: 1.1.1.1 and 1.0.0.1, and For IPv6: 2606:4700:4700::1111 and 2606:4700:4700::1001
- Save your settings, then restart your browser.
- From your iPhone's home screen, open Settings.
- Open Wi-Fi and then your preferred network in the list.
- Tap Configure DNS, and then click on Manual.
- If there are any existing entries, tap the - button, and Delete next to each one.
- Now, add 1.1.1.1 and 1.0.0.1 (as alternate DNS server for redundancy) to the DNS address.
- Now, tap the Save button on the top right.
For Router / Modem
1) Launch your web browser of choice and in the URL bar, type in 192.168.1.1 and press the return/enter key on your keyboard.

2) What you will see is a login screen where you can enter your username and password for your router – so now you will log in.
3) If your credentials were correct, you’ll be brought to the main configuration page for your router. Click on your router’s network settings button to configure your network in-depth. Mine is called My Network.

4) Once you load up your network, click on your editing button for the main source of your internet connection. Mine is going to be my Ethernet/Coaxial connection.

5) You may get a warning message that editing these settings could mess with your internet connection – go ahead and continue anyway if you’re prompted.
6) The next interface shows all the properties of your internet connection. Look for a settings or edit button – in my case it was settings.

7) Once in editing mode, look for a field related to the DNS settings. In some cases, you may need to change the setting to manual so it can be modified rather than automatically set.

8) Choose a DNS server you wish to use, such as Google’s Public DNS server (1.1.1.1, or 1.0.0.1), and plug it into the primary and secondary DNS settings. Afterwards, click on the apply or save button at the bottom of the page.

9) After saving your changes, you will be forwarded to the same page you were at before, where you can verify your DNS change.

10) Your router may show an IP address of 0.0.0.0 for a few moments as it renews your DHCP lease and re-configures your network. Just give it about 30 seconds and your internet should be fully functional once again.
That’s all there is to it! You’ve changed your network’s DNS settings, and because you’ve done it from the router instead of the device itself, this change affects every machine on your network immediately.
proof of Speed
NO Cloudflare DNS

With Cloud Flare DNS

My Modem is E5220 pocket Wifi 3G speed
Walang mawawala kung i try mo hihi
Overall Result: You Now Have more Faster Internet and More Secured Internet
Attachments
-
You do not have permission to view the full content of this post. Log in or register now.