J
Jeanh
Guest
5 Handmade Projects That Look Totally Professional

Vintage Ring
New to jewelry making? This is a perfect starter project. Utilize old brooches or jewelry parts to create this stunning ring.
Materials:
Vintage brooch or single earring
Gold ring shank with a flat pad
Tools:
Clippers
Fingernail file or sandpaper (optional)
E-6000 glue
Clamp or wire (optional)
What to Do:
1. With the clippers, remove any brooch backing, earring post, clip-on earring back, or jump rings on your vintage piece. Make sure there is a flat spot on the back of the vintage piece for gluing. If there isn't one, make one with the fingernail file or sandpaper.
2. Add E-6000 glue to both the ring pad and the back of the vintage piece. Wait 10 minutes for the glue to begin curing and then put the two pieces together. For even more security, clamp or wire them together and let the glue dry overnight.

Geometric Hoop Earrings
A reinvention of the classic hoop earring, this design looks modern and edgy.
Materials:
12 in/30.5 cm gold half-hard square wire, 20 gauge
Tools:
Ruler
Clippers
Round-nose pliers
Chain-nose pliers
Fingernail file or sandpaper
What to Do:
1. With the clippers, cut two 6-in-/15-cm-long pieces of the square wire.
2. With the round-nose pliers, grip one end of one wire piece 1/16 in/4 mm from the end and fold the wire back onto itself, creating a U-shape. This will become the catch. It will hold the part of wire that goes through your ear piercing in place.
3. With the chain-nose pliers, grip the wire about 2 in/5 cm down from the U-shape you just made, and bend the wire to the right at a 45-degree angle.
4. Now create the point at the bottom center of the earring. With the chain-nose pliers grip the wire 1/2 in/1 cm away from the previous bend, and bend the wire up and to the right to make a 90-degree angle.
5. With the chain-nose pliers, make a 45-degree angle in the wire 1/2 in/1 cm up from the point you just made. This bend will be symmetrical to the first bend.
6. Now make the post of the earring, which will pierce the ear, by bending the wire to fit under the U-shaped catch. With the chain-nose pliers, grip the wire 2 in/5 cm up from the previous bend, bend the wire toward the U at a 90-degree angle, and tuck it under the U-shaped catch.
7. Adjust the angles of the earring with your fingers as needed. If there are any kinks or uneven sections of wire, straighten them out by gently clamping down on the wire with chain-nose pliers.
8. Trim the post end of the wire so that there is at least a 1/8 in/3-mm section of wire beyond the U-shaped catch.
9. Use a fingernail file or sandpaper to taper and smooth this end of the wire so that the earring is comfortable in your earlobe.

Sparkly Hair Comb
Make your updo stand out by adding assorted crystals to a gold hair comb.
Materials:
Assorted crystals
Gold hair comb
1 yd/1 m gold wire, 26 gauge
Tools:
Chain-nose pliers
Clippers
E-6000 glue
What to Do:
1. Play around with the assorted crystals to design a layout that fits on the hair comb. This style works best when the design looks organic like a mash-up of components in different sizes and shapes.
2. Start attaching the crystal stones that have holes or settings. To begin with the chain-nose pliers, wrap one end of the wire around a tooth on one side of the comb several times to anchor the wire to the comb. Thread the wire through a hole or setting in one crystal and then wrap it around an adjacent tooth of the comb, securing it. Work from one side of the comb to the other. Wrap the wire around a tooth at the opposite side of the comb to anchor it again. With the clippers, snip any excess wire, and use the pliers to tuck in the sharp end.
3. Add in the other stones with dabs of glue. The glue dries slowly, so you'll have plenty of time to adjust the stones as you go!
 J
J
Shoe Clips
For a more advanced project, try this DIY shoe clip accessory.
Materials:
1 yd/1 m of silk ribbon, 1 in/2.5 cm wide
2 crystal components or vintage clip-on earrings
2 small silver filigree findings
Thread, in a color to match the ribbon
2 shoe clip findings
Tools:
Ruler
Scissors
Tacky Glue
Sewing needle
E-6000 glue
What to Do:
1. Cut two 15-in/38-cm lengths of silk ribbon, and tie each piece in a simple bow.
2. With one of the bows in your hand, make a sandwich, with the bow in the middle, a crystal component centered on the top, and a filigree finding centered on the bottom.
3. Tack the three layers to each other with a small dab of Tacky Glue.
4. Repeat for the second bow. Let dry overnight.
5. Thread the sewing needle, and stitch together the three sandwiched layers of one bow-the filigree finding, ribbon, and crystal component.
6. Once the three components are secure, stitch one of the shoe clip findings to the filigree finding. These clips will get lots of wear on your shoes, so make at least 10 stitches to secure the clip to its decorative top. Shoe clips generally have two holes made just for stitching them to a surface, but if your clips don't, you can use E-6000 glue to attach them to the filigree finding.
7. Tie off the thread with a secure knot and trim any excess thread.
8. Repeat to make the second silk bow shoe clip.

High-Low Tie Back Necklace
With this project, you can create a necklace that varies in length depending on the ribbon you choose.
Materials:
14 in/35.5 cm of silver snake chain, 4 mm dia.
4 silver end caps with 1 loop, which fit snugly around the chain, 5 mm dia. x 8 mm long
5 stone beads with top-drilled holes, 20 mm wide x 28 mm long
1 ft/30.5 cm flexible beading wire, thin enough to thread through the bead holes
2 silver-tone crimp beads, 2 mm dia.
2 small silver jump rings
2 yd/2 m ribbon, 1 in/2.5 cm wide
Tools
Clippers
Ruler
E-6000 glue
Chain-nose pliers
Scissors
What to Do:
1. With the clippers, cut the snake chain in half. Glue each of the 4 ends of the chain into an end cap. Let dry overnight.
2. Arrange the 5 stone beads in a gentle curve on your work surface.
3. Thread the 12-in/30.5-cm piece of flexible beading wire through the loop on one of the end caps, and thread both ends of the flexible beading wire through a crimp bead.
4. Thread the stones onto the flexible beading wire. Add the second crimp bead, and thread the wire through the loop on the second end of the cap and back through the crimp bead. With the chain-nose pliers, crimp the crimp bead, and clip any excess wire, leaving a short tail.
5. Attach a small jump ring to the loops on each of the two remaining end caps.
6. With the scissors, cut the ribbon in half. Thread one of the pieces of ribbon through a jump ring. Pull the ribbon halfway, until the jump ring is in the center of the ribbon.
7. Loosely tie a knot with the ribbon around the jump ring, covering it.
8. Repeat on the other end of the chain with the other length of ribbon. You now have 2 lengths of ribbon on each side. To wear the necklace, choose how long you want to wear it and, with the ribbon, tie a bow in the back.
 Janet Crowther
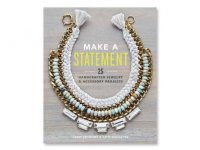
Make a Statement
For step-by-step instructions on how to make 25 standout statement pieces of jewelry (from bib necklaces to classic charm bracelets) You do not have permission to view the full content of this post. Log in or register now..

Vintage Ring
New to jewelry making? This is a perfect starter project. Utilize old brooches or jewelry parts to create this stunning ring.
Materials:
Vintage brooch or single earring
Gold ring shank with a flat pad
Tools:
Clippers
Fingernail file or sandpaper (optional)
E-6000 glue
Clamp or wire (optional)
What to Do:
1. With the clippers, remove any brooch backing, earring post, clip-on earring back, or jump rings on your vintage piece. Make sure there is a flat spot on the back of the vintage piece for gluing. If there isn't one, make one with the fingernail file or sandpaper.
2. Add E-6000 glue to both the ring pad and the back of the vintage piece. Wait 10 minutes for the glue to begin curing and then put the two pieces together. For even more security, clamp or wire them together and let the glue dry overnight.

Geometric Hoop Earrings
A reinvention of the classic hoop earring, this design looks modern and edgy.
Materials:
12 in/30.5 cm gold half-hard square wire, 20 gauge
Tools:
Ruler
Clippers
Round-nose pliers
Chain-nose pliers
Fingernail file or sandpaper
What to Do:
1. With the clippers, cut two 6-in-/15-cm-long pieces of the square wire.
2. With the round-nose pliers, grip one end of one wire piece 1/16 in/4 mm from the end and fold the wire back onto itself, creating a U-shape. This will become the catch. It will hold the part of wire that goes through your ear piercing in place.
3. With the chain-nose pliers, grip the wire about 2 in/5 cm down from the U-shape you just made, and bend the wire to the right at a 45-degree angle.
4. Now create the point at the bottom center of the earring. With the chain-nose pliers grip the wire 1/2 in/1 cm away from the previous bend, and bend the wire up and to the right to make a 90-degree angle.
5. With the chain-nose pliers, make a 45-degree angle in the wire 1/2 in/1 cm up from the point you just made. This bend will be symmetrical to the first bend.
6. Now make the post of the earring, which will pierce the ear, by bending the wire to fit under the U-shaped catch. With the chain-nose pliers, grip the wire 2 in/5 cm up from the previous bend, bend the wire toward the U at a 90-degree angle, and tuck it under the U-shaped catch.
7. Adjust the angles of the earring with your fingers as needed. If there are any kinks or uneven sections of wire, straighten them out by gently clamping down on the wire with chain-nose pliers.
8. Trim the post end of the wire so that there is at least a 1/8 in/3-mm section of wire beyond the U-shaped catch.
9. Use a fingernail file or sandpaper to taper and smooth this end of the wire so that the earring is comfortable in your earlobe.

Sparkly Hair Comb
Make your updo stand out by adding assorted crystals to a gold hair comb.
Materials:
Assorted crystals
Gold hair comb
1 yd/1 m gold wire, 26 gauge
Tools:
Chain-nose pliers
Clippers
E-6000 glue
What to Do:
1. Play around with the assorted crystals to design a layout that fits on the hair comb. This style works best when the design looks organic like a mash-up of components in different sizes and shapes.
2. Start attaching the crystal stones that have holes or settings. To begin with the chain-nose pliers, wrap one end of the wire around a tooth on one side of the comb several times to anchor the wire to the comb. Thread the wire through a hole or setting in one crystal and then wrap it around an adjacent tooth of the comb, securing it. Work from one side of the comb to the other. Wrap the wire around a tooth at the opposite side of the comb to anchor it again. With the clippers, snip any excess wire, and use the pliers to tuck in the sharp end.
3. Add in the other stones with dabs of glue. The glue dries slowly, so you'll have plenty of time to adjust the stones as you go!
 J
JShoe Clips
For a more advanced project, try this DIY shoe clip accessory.
Materials:
1 yd/1 m of silk ribbon, 1 in/2.5 cm wide
2 crystal components or vintage clip-on earrings
2 small silver filigree findings
Thread, in a color to match the ribbon
2 shoe clip findings
Tools:
Ruler
Scissors
Tacky Glue
Sewing needle
E-6000 glue
What to Do:
1. Cut two 15-in/38-cm lengths of silk ribbon, and tie each piece in a simple bow.
2. With one of the bows in your hand, make a sandwich, with the bow in the middle, a crystal component centered on the top, and a filigree finding centered on the bottom.
3. Tack the three layers to each other with a small dab of Tacky Glue.
4. Repeat for the second bow. Let dry overnight.
5. Thread the sewing needle, and stitch together the three sandwiched layers of one bow-the filigree finding, ribbon, and crystal component.
6. Once the three components are secure, stitch one of the shoe clip findings to the filigree finding. These clips will get lots of wear on your shoes, so make at least 10 stitches to secure the clip to its decorative top. Shoe clips generally have two holes made just for stitching them to a surface, but if your clips don't, you can use E-6000 glue to attach them to the filigree finding.
7. Tie off the thread with a secure knot and trim any excess thread.
8. Repeat to make the second silk bow shoe clip.

High-Low Tie Back Necklace
With this project, you can create a necklace that varies in length depending on the ribbon you choose.
Materials:
14 in/35.5 cm of silver snake chain, 4 mm dia.
4 silver end caps with 1 loop, which fit snugly around the chain, 5 mm dia. x 8 mm long
5 stone beads with top-drilled holes, 20 mm wide x 28 mm long
1 ft/30.5 cm flexible beading wire, thin enough to thread through the bead holes
2 silver-tone crimp beads, 2 mm dia.
2 small silver jump rings
2 yd/2 m ribbon, 1 in/2.5 cm wide
Tools
Clippers
Ruler
E-6000 glue
Chain-nose pliers
Scissors
What to Do:
1. With the clippers, cut the snake chain in half. Glue each of the 4 ends of the chain into an end cap. Let dry overnight.
2. Arrange the 5 stone beads in a gentle curve on your work surface.
3. Thread the 12-in/30.5-cm piece of flexible beading wire through the loop on one of the end caps, and thread both ends of the flexible beading wire through a crimp bead.
4. Thread the stones onto the flexible beading wire. Add the second crimp bead, and thread the wire through the loop on the second end of the cap and back through the crimp bead. With the chain-nose pliers, crimp the crimp bead, and clip any excess wire, leaving a short tail.
5. Attach a small jump ring to the loops on each of the two remaining end caps.
6. With the scissors, cut the ribbon in half. Thread one of the pieces of ribbon through a jump ring. Pull the ribbon halfway, until the jump ring is in the center of the ribbon.
7. Loosely tie a knot with the ribbon around the jump ring, covering it.
8. Repeat on the other end of the chain with the other length of ribbon. You now have 2 lengths of ribbon on each side. To wear the necklace, choose how long you want to wear it and, with the ribbon, tie a bow in the back.
 Janet Crowther
Make a Statement
For step-by-step instructions on how to make 25 standout statement pieces of jewelry (from bib necklaces to classic charm bracelets) You do not have permission to view the full content of this post. Log in or register now..
Attachments
-
You do not have permission to view the full content of this post. Log in or register now.