Your laptop should shuts down when it overheated, even if you’re doing some work on it or playing games. Heating cause the internal damage to your laptop’s hardware and by shutting down or turning off hardware direly can prevent your hardware to get damaged and that’s why your laptop turn’s off directly to save itself and it’s also necessary to do that for your laptop. Normally laptop heats because of heat sink blockage, or a broken cooling fan. Sometimes laptops fan don’t able to works perfectly due to blockage of dust in the heat sink and that dust blocks the cool air to pass between the heat sink and cools it down. If that cooling process stops or slows down then your computer starts to heating up slowly and shuts down directly.
To fix this problem there are two ways to do it by your self –
1. Easy way – In easy way we gonna use a vacuum cleaner to pull out all the dust which was stocked in your laptop’s heat sink and that will takes only 2 min to fix your laptop and you’ll don’t have to open your laptop.
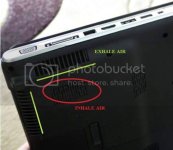
Step 1 – Find your laptop’s fan location.

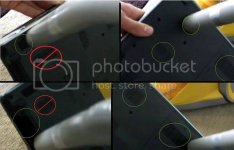
Step 2- Use the vacuum cleaner to pull the dust out.

Step 3 – Turn on your laptop and test it.
If that won’t works for you then you should move on to our next solution below.
2. Hard Way – If the above solution didn’t works for you, then you should disassemble your laptop and clean the fan manually. To do this you’ll need to see disassemble tutorial video on web to do it in right way and I’ll prefer you to search a disassemble video of your laptop on YøùTùbé because on YøùTùbé there are variety of videos to show you how to do it practically.
Step 1 – Disassemble Your Laptop.
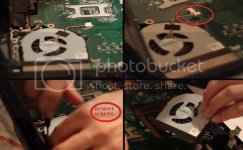
Step 2 – Locate the fan, unplug the fan power and remove the fan from the laptop.

Step 3 – Clean the dust.

Step 4 – attach the fan back to their place.
Step 5 – Test the fan is working or not (before assembling).
If the fan doesn’t move then you have a faulty fan, replace it with new one.
Step 6 – Assemble back your computer and work on!!!!
To fix this problem there are two ways to do it by your self –
- Easy way
- Hard way
1. Easy way – In easy way we gonna use a vacuum cleaner to pull out all the dust which was stocked in your laptop’s heat sink and that will takes only 2 min to fix your laptop and you’ll don’t have to open your laptop.
Step 1 – Find your laptop’s fan location.

Step 2- Use the vacuum cleaner to pull the dust out.

Step 3 – Turn on your laptop and test it.
If that won’t works for you then you should move on to our next solution below.
2. Hard Way – If the above solution didn’t works for you, then you should disassemble your laptop and clean the fan manually. To do this you’ll need to see disassemble tutorial video on web to do it in right way and I’ll prefer you to search a disassemble video of your laptop on YøùTùbé because on YøùTùbé there are variety of videos to show you how to do it practically.
Step 1 – Disassemble Your Laptop.
Step 2 – Locate the fan, unplug the fan power and remove the fan from the laptop.

Step 3 – Clean the dust.

Step 4 – attach the fan back to their place.
Step 5 – Test the fan is working or not (before assembling).
If the fan doesn’t move then you have a faulty fan, replace it with new one.
Step 6 – Assemble back your computer and work on!!!!
Attachments
-
You do not have permission to view the full content of this post. Log in or register now.